The promotion model assembles components to be promoted to your production server. When a promotion is stowed, the promotion model generates several build files within the sandbox environment that must be moved to the production environment when you are ready to promote your changes. The process of transferring these files from the sandbox to the production server is called staging. There are two main ways that build files can be staged:
- The production server can automatically FTP (pull) the build files from the sandbox to itself.
- You can manually ftp the build files using Filezilla or some other FTP client to push these files to the production server.
Generally, option 1 is used provided your sandbox hosts an FTP server.
What Files Need to be Copied?
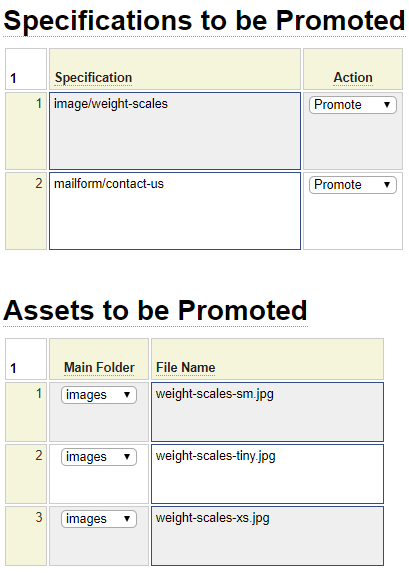
When you stow a promotion, the name of the promotion is used to derive the folder where the build files are stored. Here we see a set of 6 files that were generated when the fall_sale specification was stowed:

The names of all of the files end with the current date and time to reflect when the build was created. The first four files are always present. The transfer_private zip file will be generated if the build includes information to be copied to the private_data folders. The transfer_public file will be generated if the build includes assets to be copies to the public_html folders.
Copying the Files Manually
The main reason you might have to copy the build files manually is that your sandbox does not host an FTP server. For example, if your sandbox is a desktop computer some ISPs do not allow customers to open up port 21 to host an FTP server.
To copy the files manually, open Filezilla or some other FTP client and copy the folder containing the build files to your production server as shown here:

Make note of the fact that the name of the folder containing the build files in the sandbox is promotion (singular) whereas the name of the folder on your production server is promotions (plural). In the image above, since the fall_sale folder is not yet defined on the production server, this folder would need to be copied including all of its contents.
Automating the FTP Process
If your sandbox runs an FTP server, you can automate the FTP process so that the promotion program that runs on your production server (via page sysadmin/promotion_browse) automatically pulls the build files from your sandbox.
There are two methods by which the production server can obtain the FTP credentials required by the sandbox:
- The production server can issue an http(s) request to the sandbox to fetch its credentials.
- The production server can obtain this information from local config files.
Note that both methods are very secure since the user id and password are always encrypted when being sent via the internet, even when using the http protocol. Also, the request, itself, is encrypted (or doubly encrypted if using https). Option 1 is a good idea if your sandbox accepts public http(s) requests especially if the sandbox supports multiple production servers since this allows you to save your sandbox user name and password in one place regardless of how many production servers utilize the sandbox server.
Defining Your Password on the Sandbox
If you are using option 1, you must add two lines to your sandbox config file (located in private_data/system/config). The lines will look something like this:
$this->set_encrypted_ftp_user('znKPQ8afzRKjoIjR*anUzRkxtaEFWdz09*RaklJS3BvDBYoXTDOyBfCQm');
$this->set_encrypted_ftp_pwd('VVGZI47dH7aYn2G3*U202bG9XSWl6Z3VmRWlFVnF0bz0*Mh9JP99rUGv72iEgb9ZWQgr');
To generate the encrypted credentials visit your sandbox url https:\\genhelm.yoursandbox.com/?page=sysadmin/ftp_config. The first link on this page will let you generate the lines similar to the above code that you can paste into your sandbox config file. You will need to enter your unencrypted FTP user name and password and the page will generate the encrypted versions.
Defining Your Sandbox Password on your Production Server(s)
To define your sandbox password on your production server, you must create a PHP include file such as the following in your production environment:
<?php
$this->set_domain('domain or ip address of your sandbox');
$this->set_ftp(true); // Sandbox runs an FTP server
$this->set_http(false); // Set to 'http' or 'https' if your sandbox accepts http(s) requests
$this->set_ftp_pasv(true); // Change to false to disable passive ftp mode
$this->set_ftp_user('8Tb0CYBc876pGkNv*aFFzT2hHR1RBZz09*kjPpsD8voK8eIsargyMvzgq');
$this->set_ftp_password('X_cNKlic3_J4Lynj*aVZmZzRsVDBGTEhOZFArMDQ2TT0*M_e0b01nWfJPiCyZCVz7BQr');
$this->set_ftp_private_path('/private_data'); // Only needed to override sandbox private data ftp path
$this->set_ftp_ssl(true); // Change to false if your sandbox is not configured for SSL
?>
This code needs to be named using whatever logical name you want to give your sandbox. For example, if you call this devbox1, the file will be named devbox1.inc and it must reside within the folder private_data/system/config/sandbox on your production server.
The code above is also generated by navigating to the page sysadmin/ftp_config. In this case, you choose the second link on the page. In your production environment you can run this from any website that is hosted on your production server to which you have a login. If you don't have a production website created yet, you can run this from the system subdomain as in:
https://system.your-prod-server.com/sysadmin/ftp_config
You will need login access to system in order to load this page.
Alternatively, you can generate the required code on the sandbox provided you supply the server password associated with your production server. You will need to copy this from the existing config file within your production environment.
Note that the sandbox config file (located on your production server) is required even if you are storing the encrypted credentials on the sandbox itself. In such a case, the config file will look something like this:
<?php
$this->set_domain('mysandbox.com');
$this->set_ftp(true); // Sandbox runs an FTP server
$this->set_http('https'); // Set to 'http' or 'https' if your sandbox accepts http(s) requests
$this->set_ftp_pasv(true); // Change to false to disable passive ftp mode
$this->set_ftp_ssl(true); // Change to false if your sandbox is not configured for SSL
?>
With this configuration, the promotion function running in production will issue an https request to mysandbox.com in order obtain the sandbox credentials.
Normally, when the defined FTP user first establishes an FTP connection, the root directory should coincide with the sandbox's private data folder. In such a case, you do not need to include the code:
$this->set_ftp_private_path('path to private root');
This code is needed if the default root directory is higher in the file path and is used to establish the path to the private_data folder.
If your sandbox does not host an FTP server, the config file might look like this:
<?php
$this->set_domain('mysandbox.com');
$this->set_ftp(false); // Sandbox is not an FTP server
?>
In this case, you will need to manually FTP the build files to your production server.
Identifying the Sandboxes to your Production Server
The next step is to update your production config file (located in private_data/system/config) to point to the correct sandbox config file. The code you add will depend on how many sandboxes support the production server.
One Sandbox Only
If you only have one sandbox, simply add one line of code to the production config file such as the following:
$this->set_sandbox('devbox1');
The name you choose must agree with the name of the .inc file that you saved within private_data/system/config/sandbox but don't include the .inc extension in the set_sandbox parameter.
Multiple Sandboxes
If your production server is supported by several sandboxes, the set_sandbox function will be passed an array of sandbox definitions as shown here:
$this->set_sandbox(array('somesite1' => 'devbox1', 'anothersite' => 'devbox2', '!default' => 'devbox3');
In this case, the keys of the array reflect the site directories of various sites and the value of the array is the name of the sandbox to be used for the site. The special key '!default' will be used for sites whose site directories are not specifically listed.
It is also possible to override the name of the sandbox to be used for a specific site by using the site_settings model for the site as shown here:

For all sandbox names referenced, there must be a corresponding .inc file on you production server within the private_data/system/config/sandbox folder.