By default, all pages implemented in your website can be accessed by all users. If your site has pages that contain sensitive or private information you will want to secure these pages against unauthorized access. The first step in securing a page is to specify the Login Required page property available within the Advanced Page Properties section shown here.

If your site has pages designated in this way when a user attempts to access these pages, the system will first check to ensure that the user is logged in. If they are not logged in, the user will be automatically redirected to a login page and upon successfully logging in they will be redirected back to the originally requested page.
When restricting page access using the Login Required flag you will need a way to define users of the site. GenHelm provides three different methods for defining users and the desired method can be chosen on the site_settings definition for each site.

The user model works in conjunction with the first option which provides a way to define users without the need for a database. This method for defining users is ideally suited to situations where there is a small number of users who require login to access a website. Since new users can only be defined by the development staff and promoted to production by someone with production access, managing users in this way helps guard against unauthorized access.
When defining users using the user model, a 1-time password is established which users will be required to change when they first log into the system. By default, the system allows up to four password failures within the previous five minutes and up to 10 failed password attempts within a single day. This helps to thwart bots from attempting large numbers of user/password combinations. These limits can be adjusted using the config values on site settings as shown here:

Site Settings can also be configured to require users to change their password periodically.
Deciding on User Id Convention
Different websites can have different formats for user ids. Ideally user ids should not be easy to ascertain by hackers. For this reason, it is a good idea to avoid creating user ids such as "admin", "control", "webmaster", "DBA", "superuser", etc. Email addresses are allowed for use as user ids however these will tend to be less secure since employee emails are often easy to ascertain.
When defining users for GenHelm, it is useful to use ids that will be discernable to all internal users so that developers can easily determine who last modified a certain specification. One possible convention for user ids is to use a certain number of characters of the person's last name followed by characters of their first name (or vise-versa). This would result in options such as the following for user "Barney Rubble": brubble, brubbl, barubb, rubblb, rubbleb, rubbbarn, etc. User ids cannot contain spaces however ".", "-" and "_" can be used as separator characters. Adding a separator character may improve the readability of the users id form you choose. For example, b.rubble, b.rubbl, ba.rubb, rubbl.b, rubble.b, etc.
Note that user ids are not case sensitive and are always treated as lower case.
Where Should Users Be Defined?
If users are only permitted access to a specific website, the user definition should be created within the site itself. Definitions for administrators, multi-site web developers and super-users who require access to many different sites can be created within the pseudo site system and doing so will give them login access to all sites on the server using a single user id and password.
Defining Users
Consider the following user definition:

The name that this definition is stowed under becomes the user id that will be defined. Unlike most specifications that do not permit the @ symbol and . characters, these characters are allowed for user definitions in case you want to align the user ids with email addresses.
Most of the user attributes are not used explicitly by the system however they can be used by applications developed in GenHelm. Here we discuss the attributes that are used:
The email field is optional however it is important if you want to allow users to reset their password. Notice that the default login form has a Forgot Password link.

This link leads to a page that shows the following form:

If you don't define an email address for your users they will not have the ability to use this form.
Cell Phone
The cell phone number is optional however it adds a level of security to the Forgot Password form shown above since users will not be able to send a password reset email without knowing the correct cell phone number associated with the user id to be reset. If the cell phone number on the user definition is left empty, this field must also be left blank on the Forgot Password form.
Entering your user's cell phone numbers is also a good idea in case you want to implement a custom logon form that supports 2-factor authentication.
Locale
This is used to set the system language and locale values associated with the user. If the site uses features such as translation objects, messages and locale definitions these will all be influenced by these settings.
Timezone
If a timezone is set for the user, this will override the default local timezone set on site_settings.
Temporary Password
You can either enter a temporary password or allow the system to generate one for you. If you have not entered a password when you issue the stow command you will see a message such as the following:

Be sure to make note of the temporary password since you will not be able to retrieve this from the system later. If you lose this password before it gets used you will need to stow the definition again to generate a new password or enter a specific password. This password must be supplied by the user on the very first login attempt.
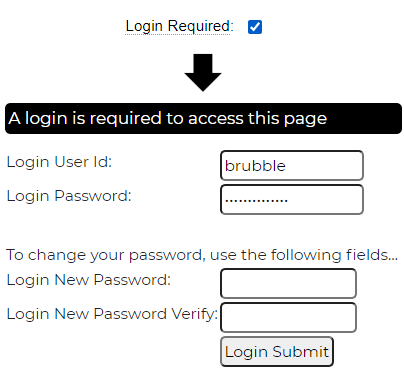
As you can see here, the user will not be able to complete the login process unless they supply a permanent password on the initial login screen:

Status
Most of your users will be defined with status active. The other statuses allow you to disable users without physically deleting their user record. Since user ids may be stored on stowed specifications and database records you may want to preserve definitions for terminated employees or inactive users so that user ids don't get recycled by another user and so that you can identify users who may have modified a certain object even if they are no longer active. Only users whose status is set to 'active' or '' will be allowed to log into the system.
Status Date
This is a read-only value that reflects the date that the user's status was last changed.
Permanent Passwords
When users log in for the first time they must provide a permanent password. When this happens, the system encrypts their password and stores the encrypted value under the site's private_data users folder. Temporary passwords are only used in cases where no permanent password is found for the user within the users folder. Therefore, if you wish to reset a user's password you can delete their permanent password record within the users folder. This will cause the system to revert back to the previously issued temporary password. If you have not kept a record of this you will need to stow and promote the user definition in order to establish a new temporary password. This process is automated through the use of the Forgot Password form described above.
Login Attempts
When users attempt to log in with either an incorrect password or user id, the login attempt is recorded under the user's IP address within the site's private_data data/login_attempts folder as shown here:

We can see that on 2021-04-23 two users had failed login attempts. User's who reached the daily limit of login attempts will not be able to log in until the next day unless this log is cleared by an administrator. If users are able to successfully reset their password using the Forgot Password form the log will be cleared automatically. If you, as an administrator, manually reset a user's permanent password to allow them to use a temporary password you may also need to delete the user's password attempt file for the current day in order for the user to log on with their temporary password.
User Keyword Data
Using the User Keyword grid you can associate any number of attributes with each user. Different applications will have different requirements in terms of user attributes.
Accessing User Data
User data can be accessed by calling the site method get_user_data($attribute). This can be used to obtain both the predefined attributes and custom attributes defined using User Keyword Data. The predefined attribute names are as follows:
userid
family_name
given_name
display_name
email
title
status
status_date
avatar_imageid
language
locale
timezone
Here is a program that illustrated how to show all of the user data associated with the current user including custom attributes company and department.
$attr = array('userid','given_name','family_name''display_name','email','title','status','status_date',
'avatar_imageid','language','locale','timezone','company','department');
$return = '';
foreach ($attr as $name) {
	$value = $this->site->get_user_data($name);
	$return .= $name.': '.$value.'<br />';
}
return $return;
Roles and Groups
In addition to simply requiring a user to log into the system in order to access a page you can also restrict pages to a specific set of users by setting functional security for the page as we show here:

This page can only be accessed by someone in the staff group. All staff roles have been given access but the page could also be restricted to specific roles. Since the user shown above is not defined to the staff group they would not be allowed access to this page.
Other User Definition Methods
XML Definitions
Another method of storing user data is to save user information in XML format. In this case, the XML files must be stored under the site's private_data data/users_xml folder. The name of the file should be userid.xml where userid is the id to be granted access to the system. This could be an email address if you wish. Here is an example of an xml definition.
<?xml version='1.0' encoding='UTF-8'?>
<ROOT>
	<session_data version="1.0">
		<given_name>Fred</given_name>
		<family_name>Flintstone</family_name>
		<temporary_password_hashed>$2y$10$ZBmIfcyA0ngplOW3xLgFauRPAgp0q7cjBU9PzBvmjag299d4UbCG.</temporary_password_hashed>
		<email>fred@bedrock.com</email>
		<city>Bedrock</city>
		<state>Utah</state>
		<country>USA</country>
		<status>active</status>
		<status_date>2021-06-01</status_date>
	</session_data>
</ROOT>
In this example, city, state and country are custom keywords. This format coincides with what is saved by the $session_save function which makes it easy to generate this xml structure from session data.
The only required value is temporary_password_hashed. This value should be established by using the following function on a designated temporary password:
$temporary_password_hashed = password_hash($temporary_password,PASSWORD_DEFAULT);Setting Security Profile
If you wish to apply functional security to users defined via the XML method you can add additional security_profile nodes as shown here:
<?xml version='1.0' encoding='UTF-8'?>
<ROOT>
	<session_data version="1.0">
		<given_name>Fred</given_name>
		<family_name>Flintstone</family_name>
		<temporary_password_hashed>$2y$10$ZBmIfczA0ngplOW3xLgFauRPAqp0q7cjBU9PzBvmjag299d4UbCG.</temporary_password_hashed>
		<email>fred@bedrock.com</email>
		<city>Bedrock</city>
		<state>Utah</state>
		<country>USA</country>
		<status>active</status>
		<status_date>2021-06-01</status_date>
	</session_data>
	<security_profiles>
		<security_profile environment="0" site_directory="" group="supplier" role="shipper" />
		<security_profile environment="0" site_directory="" group="supplier" role="receiver" />
	</security_profiles>
</ROOT>
Custom Login Handler
The third option for handling logins is to build a custom class named user_api. This will be called to authenticate the user using the following method
$success = $user_api->load_user($user_profile_obj,$userid, $password, $new_password, $new_password_verify);This class can define a set_site method to accept the current site object.
The load_user message should return true if successful, false otherwise. Since this class is passed an instance of the user_profile object, it can return false and set a failure message by calling the method:
return $user_profile_obj->authentication_error($userid);Login Error Messages
When users attempt to log in with either an incorrect user id or incorrect password, they are given the same error message. This is done intentionally to prevent hackers from attempting to guess user ids then, once they have confirmed a user id is valid, attempting to hack the password. Since hackers will always get the same message, they have no way of knowing whether the just the user id is invalid or just the password or both.
Defining GenHelm Developers
Developers using GenHelm must be defined to the system in the same way as other users. They can be defined directly within the genhelm library or within system. If defined within system, they will be able to log into any application defined on the same server. If you want to grant a GenHelm user authority to create new websites (using the "create site" command) you must define them to the site-admin group with the site-creator role as shown here:

Defining Users Who Can Promote Website Changes
In order to promote changes to a website, users must be defined under the site-admin group with a role of promoter as shown here: