The report model is used to write tab-delimited report files. Typically these report files are written during the completion of a transaction to log information related to the transaction.
Defining the Report Columns
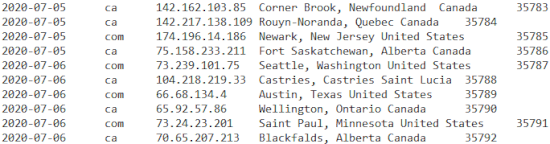
In most cases, a report file will just contain a header row and one data row. Here is an example of a report row definition:

Notice that the first row is used to define textual column headings. This row is only written once when the report file is first created. This row serves as the column headings if the report is downloaded and opened in Excel, for example.
The next row will be written each time the report is requested. In most cases, $functions will be used to render the report values. If the report is being created during a post request, $post(field_name) can be used to save the values that were posted on the page. In the example above, we see that several of the values were available in session variables so we use the $session function to render these. This particular report could be called from multiple sites (for example a .com site and a .ca version of the site) so we also use $site(tld) to log which domain triggered the report row.
The Example Command
You can use the example direct command to pre-populate the report columns with standard information that might be written when a form is posted. After using the command you can add or remove columns as required.
The Import Command
If you want the report to contain fields from an existing form, you can enter the command import form form-name, where form-name is the name of the form to be imported. This will pull in all of the form fields automatically and add these to the report as $post values. If this form is not being posted at the time the report is generated you must change these values to use the $session instead, assuming the form values were written to the session. You can use the change command to change post functions to session functions as in "change post session".
Other Report Properties
Although reports are defined as web pages, in most cases they will never be rendered as actual pages of your site. In most cases, these "pages" will not be part of a larger layout so you should set the layout to "none" which is a very simple layout that only includes the contents of the main "page" so there is no header, footer, styles, etc.
Additionally, you normally do not want the report pages to be indexed so the noindex property should be set. In most cases your report will define the common properties as shown here:

Linking a Report to a Transaction
Transactions are used to group a set of forms and to perform some processing when the user completes the form series. Generally your report "page" will be linked to a transaction as shown here:

Note that all of the reports that are saved do not have to be based on the report model. In fact, only the one on row 2 above is defined using the report model. The File Name indicated will be saved under the site's data folder (which is under private_data). In this example, the report file has a static name so the websales.txt file will get appended to indefinitely.
Another option, is to use the date as part of the file name. For example, $date(,,yyyy)-sales.txt could be used as a file name. In this case a new file would be created at the beginning of each year (at the time of the first completed transaction in the year).
Viewing the Report
There is no automated way to view a generated report. You could use the custom model to create a page that would read the contents of a report and render it to the screen. You could also download the report using ftp and open it in Excel or Google Sheets.