The promotion model is used to assemble website content to be transferred from the sandbox to the production environment for the purpose of promoting changes to your live website. The promotion process is divided into three distinct steps:
- Component selection and extraction (this is done using the promotion model).
- Staging (transferring files from the sandbox environment to the production environment).
- Promotion (updating the live production components).
Before you can promote a site for the very first time it is necessary to do some preliminary setup in the live site. If the site you wish to promote has never been published before please follow this link publishing a site for the first time.
Component Types
Components are divided into two broad classifications:
- Specifications
- Assets
Generally speaking, every component of your website should fall into one of these two classifications.
Specifications
Specifications consist of the XML used to generate a set of components as well as the components themselves. In other words, generated components must always be promoted as a unit whereby the component is tightly coupled to the specification that was used to generate the component. Only Stowed specifications can be promoted to production. If you modify a generated component, the specification used to generate that component cannot be promoted unless you re-stow the specification in order to re-sync the generated component with its specification.

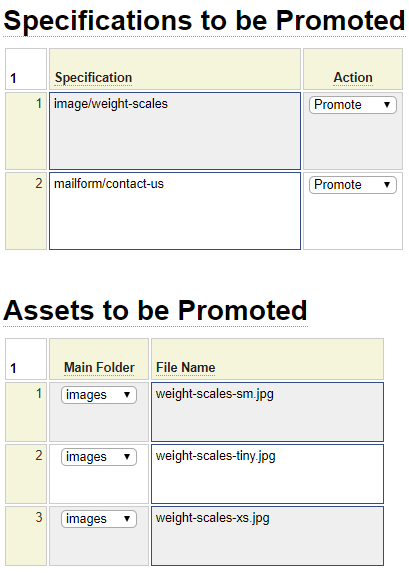
Specifications to be promoted are identified by their specification name which is entered into the first column of the specification. Specifications that are stored in subfolders must be fully qualified including the path to the specification. Do not include the .xml extension when entering specification identifiers.
Assets
Assets refer to non-generated components such as images, PDFs, audio and video files. Note that the image model is capable of generating images as well as specifications. These generated images are still considered to be assets since they have their own life-cycle which is independent of the image specification used to generate them.

Component Selection
There are four main ways that you can select the components to be promoted:
- If you only changed a small number of components you can simply type the names of these components by hand or select them from a supplied list.
- You can automatically build lists of changed components by comparing the sandbox with the production environment.
- You can search the sandbox based on various selection criteria.
Manually Entering Component Names
Although this method will work for large promotions it is generally not recommended since you risk overlooking changed components when they are simply manually entered. If you know you have only changed a few components you can simply enter these component names in the specification or asset grids. Notice that the name columns are bordered in blue. This indicates that you can double-click in these fields to select components from a list provided by a pop-up helproutine.
When using the helproutine, note that multiple components can be selected before you close the routine. Therefore, it is a good idea to insert a number of empty grid rows before you invoke help. This way you won't run out of rows in which to insert the selected components.
Comparing Production and Sandbox Files
If you want to promote everything that has been changed in the sandbox but not yet promoted the best component selection method is the first one that uses the fields below:

In most cases you will want to choose to compare Both Specifications and Assets then click the Compare Sandbox vs. Production button. This will analyse all the site components in the sandbox and production environments and automatically populate the promotion grids with any components that differ between the two environments. Be aware that this option will clear any pre-existing values from the promotion grid(s) before performing the comparison.
If the comparison finds components in your production environment that are not in the sandbox, the default action is to delete these components (later during the publish process). This can happen if you previously promoted a component but determined that it was no longer necessary so you deleted it from the sandbox. If you are confident that the component is no longer used in production you should leave the component in the grid to force the deletion of the component. Otherwise, delete the row from the grid or change the Action column to Skip so that the production component is not removed. If there are other differences that were identified that you do not want to publish at this time, simply delete these rows from the promotion grid(s).
Searching for Modified Components in the Sandbox
Large or complex websites often are maintained by several developers. Sometimes you might be ready to promote an isolated change but you don't want to promote other changes that are still being developed. If you already know the components you want to promote you can simply type these in or use the helproutine selector to find them. Another option is to search the sandbox for recent changes using the fields below:

If you know you only want to promote changes made by you, enter your user id in the Save User field. Keep in mind that another developer may have made more recent changes to something that you changed. In such a case, your change will not be selected if you search for only specifications saved by you. If you only want to promote recent changes, enter the earliest date to be considered. You don't need to enter the Save Thru Date if you want anything changed after the from date. You can also filter by model name and/or asset type. Assets can be restricted to only those assets that are related to a selected specification. For example, you might only want images that are related to an image definition that you are promoting. Click the Search Sandbox button to perform the search.
Note that, unlike the production compare option, the Search Sandbox button does not clear the grids before performing the search. Therefore you can perform multiple searches using different criteria if you wish. This would be useful if you want to promote any changes made by say two out of several developers. You could just perform the search twice, once for each Save User.
Be sure to review any messages generated by the search options to make sure there is nothing out of the ordinary. In the example below we see that one of the specifications needs to be stowed before it can be promoted:

Reviewing Comparison Data
After completing a search the grids will be filled in with information about the selected components as shown below:

The Sandbox Info column provides details of the component in the sandbox environment. The Live Info column provides details of the component in the Production Environment. In cases where the production information matches the sandbox information an = sign is used to make it easy to spot matching values. In this example above we can see that the live component was last saved by the same user as the sandbox component whereas the save date, time and size are all different between the two environments.
Note that the = signs shown under Live Modules does not imply that the module contents are the same, this only means that the names are the same. To check whether the contents are the same you can click on the link to pop up a comparison between the sandbox and production components.
Filtering Matching Components
For some searches, you may find entries in the grid where the sandbox components exactly match your production components as shown in the screen capture below:

In such a case, the action field will be defaulted to Skip because there is no need to promote this component to production. Additionally, if you check the following option:

These matching components will automatically be removed from the specification when it is stowed.
Creating Backups
For low-traffic or simple "brochure" style websites it is probably not necessary to worry about backing up the production components before promoting your changes. For mission-critical sites, you will want to create backups so that you can quickly restore the production site if you detect problems with the site after completing your promotion. The backup option can differ for specifications vs. other assets such as images and videos. This is because assets generally take up a significant amount of storage so you may not want to create backups of these each time you promote. Furthermore, missing or incorrect images generally won't prevent the site from functioning so it is less important to be able to quickly restore asset components. To create backups, use the fields shown below:

The setting above provides the default setting which can be overridden at the grid row level:

The purpose of these backup options is to create a zip file of any replaced or deleted production components at the start of the promotion so that if something goes wrong you can quickly restore the site to its previous state. For this reason you should be very careful when excluding certain components from the backup since you will not be able to perform a "full backout". Only the components for which a backup is requested will be restored if the need to perform a backout arises.
De Facto Backups
It should be noted that part of the promotion process involves creating zip files to transfer content from the sandbox to the live site. This happens irrespective of whether backups are requested. Therefore, these promotion files also serve as de facto backups if you need to review an earlier version of a component. However, these zip files cannot be restored with the same ease as performing an official back out using the backup files. Part of your site administration process should involve periodically deleting old zip files in order to free up space on your server(s). Files can be deleted in the sandbox simply by using the delete command to delete the promotion spec. On the live site you will need to use an FTP client or some other file manager to delete the promoted zip files.
Other Promotion Properties
Promotion Reason
You will need to supply a reason for your promotion. This is important because it serves to document updates to your production system.

Often the reason will be the same or similar to the spec description itself. Therefore, if you leave the reason field empty it will automatically default to the description field.
Version
The version field is not required but it may be useful for identifying a certain promotion to be published.
Stowing a Promotion
The process of stowing a promotion makes sure that all of the listed components are eligible to be promoted. If some of your selected specifications have not been stowed or are missing you will need to resolve these issues in order to complete the stow process. If you are not able to resolve these at the current time you can simply save (not stow) the specification and come back to it later once you have addressed the issues noted.
When stowing a promotion specification for the first time you can either supply a descriptive name or, if you leave off the name, you can have the name default to promotion_yyyymmdd_hhmmss which uses the current date and time.

Notice that the Stow operation creates several files that will be transferred to the production environment when the promotion is staged. Further notice that there is a publish link on the page. If you are authorized to log into the production environment you can click on the publish link to complete the promotion. Otherwise you should alert the appropriate user to the presence of the promotion files and have them complete the stage/publish process using page sysadmin/promotion_browse. In order to promote to production you must be defined with a role of promoter within the site-admin group as explained in the user model help.
For help on the next steps, invoke help from the promotion browse page.
If this is the first time the site is being promoted there may not be any users who are authorized to complete the promotion steps. It is generally recommended to define at least one "power user" to the system library. This would generally be a DBA or someone in charge of security. Users who are defined within system will have access to all sites on the server. Therefore, such a user could promote a new website that does not yet have any users defined. Alternatively, you will need to define a user to the site to be promoted (using the user model). When stowing this user make note of the temporary password shown by GenHelm since this password will be required the first time the user signs into the production system. When this method is chosen to define the first user you will need to manually copy the file private_data/[site]/includes/user/[userid].inc from your sandbox environment to your production environment. After doing so, this user should be able to log into the production site in order to complete the first promotion.