Introduction
GenHelm uses a web browser interface to maintain all components. GenHelm is designed for use on up-to-date versions of Google's Chrome browser, Mozilla's Firefox, Microsoft Edge or Apple Safari. Other modern browsers may also work. Developers interact with GenHelm's integrated generation environment using a simple command line interface. Most of the time you will need only two commands:
- Edit to read in a new specification.
- Stow to save the specification while at the same time generating the underlying components.
This help describes the steps that are necessary when creating a new website from scratch.
Entering Commands
All commands are entered into the command line depicted here:

After typing a command you can either submit the command by pressing the <Enter> key or you can click on the arrow button next to the command field. An additional option is available for the stow command. To submit this command you may use the keyboard shortcut "<ctrl>s". In fact, it is a good idea to get into the habit of using <ctrl>s to stow your components since this is the most productive method of doing so.
Website Folders and Files
In a typical setup, websites are stored in the file system under two main directories:
- public_html/sitedirectory/ is used to store folders that require public access through http (or https). This is mainly for files such as images, css, JavaScript and PDF documents.
- private_data/sitedirectory/ is used to store folders that are only accessible via code. Things like php classes and includes as well as data files.
Any number of websites can be maintained and/or hosted within a single GenHelm environment provided each site contains a matching subfolder within the main public_html and private_data folders.
Defining Authorization
Only developers who are defined to the site-admin Group with the Role site-creator are allowed to create new website. If your user id is not configured with this group/role combination change this configuration before proceeding.

You will need to log out of genhelm and sign back in for the changes to take effect.
Creating a New Website
Before you can maintain a website using GenHelm it is necessary to create a subdomain for the site using your administration software such as Cpanel. If you are just developing on your local machine, for example under Windows, this step is not necessary since new sites can be created on-the-fly.
Once the subdomain has been defined you can use GenHelm to set up all of the files needed for the site. This is done by executing the command "create site subdomain name" where subdomain name is the name of the subdomain you just created. In GenHelm we refer to this subdomain name as the "site directory" or site name. In most cases, the site name will correspond with the live site domain (although this is not a requirement). For example, if you are building a new site for the domain www.spicymeatballs.com, you would typically create the necessary folders by executing the command "create site spicymeatballs". This will create a series of directories and show a number of messages such as the following:
🛈7001 Processing command "create site spicymeatballs".
🛈0003 Directory websites/public_html/spicymeatballs/ created successfully
🛈0003 Directory websites/public_html/spicymeatballs/cache/ created successfully
🛈0003 Directory websites/public_html/spicymeatballs/docs/ created successfully
🛈0003 Directory websites/public_html/spicymeatballs/images/ created successfully
🛈0003 Directory websites/public_html/spicymeatballs/styles/ created successfully
🛈0003 Directory websites/public_html/spicymeatballs/support/ created successfully
🛈0003 Directory websites/private_data/spicymeatballs/ created successfully
🛈0003 Directory websites/private_data/spicymeatballs/classes/ created successfully
🛈0003 Directory websites/private_data/spicymeatballs/data/ created successfully
🛈0003 Directory websites/private_data/spicymeatballs/downloads/ created successfully
🛈0003 Directory websites/private_data/spicymeatballs/includes/ created successfully
🛈0003 Directory websites/private_data/spicymeatballs/locate/ created successfully
🛈0003 Directory websites/private_data/spicymeatballs/messages/ created successfully
🛈0003 Directory websites/private_data/spicymeatballs/pageinfo/ created successfully
🛈0003 Directory websites/private_data/spicymeatballs/specs/ created successfully
🛈0003 Directory websites/private_data/spicymeatballs/uploads/ created successfully
🛈0003 Directory websites/private_data/spicymeatballs/users/ created successfully
🛈0001 All folders were created for site directory spicymeatballs
🛈0004 Saved program websites/public_html/spicymeatballs/index.php successfully
Switching Between Websites
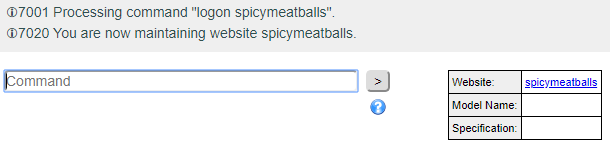
The logon command is often the first command you will use after signing into GenHelm. This is used to switch to the website that you want to work on. For our example site the command would be "logon spicymeatballs". After this command the screen will appear as follows:
Assigning Site Settings
The first GenHelm model you should use when starting a new site is called site_settings. The model is invoked using the command "edit site_settings" (the edit command can be shortened to just the letter "e").
Most of the site settings are optional however you must specify a default layout to be used for your site. In fact, you must provide the names of two default layouts:
- One layout to be used on mobile devices (mainly smartphones and other very small devices).
- Another layout to be used for all other devices (tablets, laptops, desktop devices, etc).
We will learn about layouts in detail later, for now you can just enter the layout name "standard_layout" in the Default Layout Mobile field. You can enter =m in the Default Layout Desktop field to indicate that this uses the same layout as the default mobile layout.
After entering these layouts you can stow the site settings using the command "stow" or the shortcut <ctrl>s.
Normally, when a component is being stowed for the first time, it is necessary to supply the name that you want to give to the component. Since there is only one instance of site settings per website, the name is defaulted to the standard name by the system.
The edit Command
The edit command (usually abbreviated to e) is used to edit a new or existing component. There are several variations of this command.
- If you want to work on a pre-existing component you would enter the command "e component-name".
- If you want to create a new component you would enter the command "e model-name".
As we will learn, component names do not have to be unique. For example, it is possible to have a page called "testimonials" and also have, say, a list called "testimonials". In such a case, if you enter the command "e testimonials" the system will present a list of components by this name and you can pick the one you want. Alternatively, you can use another form of the edit command which is "edit model-name component-name", for example "edit list testimonials".
Yet another option is to refer to the full name of the specification including its folder location. For example, "e list/testimonials.xml".
If you are not sure of the exact name you are looking for, you can use wildcard selection in the component name. For example, "e t*" will show all components with names beginning with the letter t.
The new Command
If you are not sure of the model that you want to use, you can enter the command "new". This will present you with a list of models from which to choose. The new command can also be passed the name of a model that you want to use. For example, "new anchor" will launch the anchor model.
Creating Your First Page
One of the common "catch all" models is called "tags". This model allows you to create any set of html tags. We will use this model to create a sample home page. To do so, we can enter the command "e tags". This will present an empty specification for the tags model. For our test page we will simply enter the contents "Hello World".
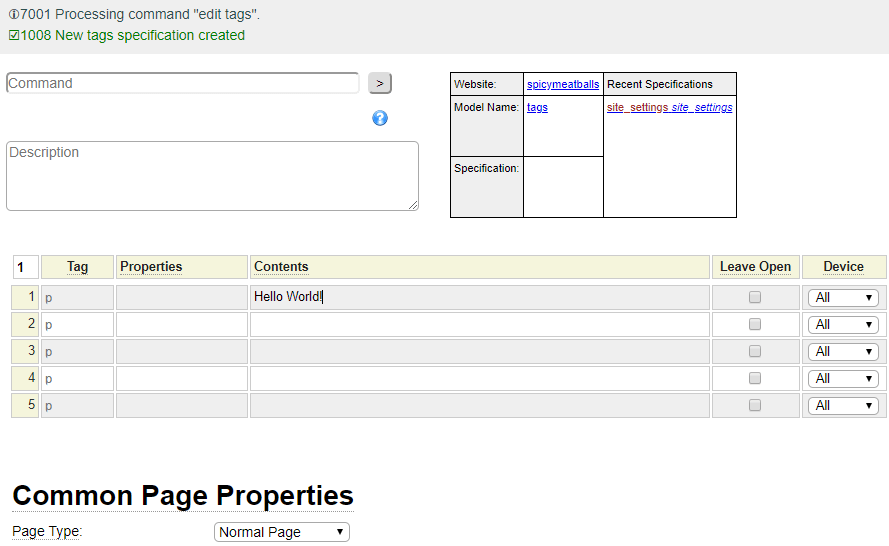
Notice that the name of the current model is shown in the information area to the right of the command line. In this case, the tags model is indicated as a hyperlink. This tells you that model-specific help is available. Click on these model name links whenever you need help related to a specific model.
Every component of your website needs to have a description before it can be saved. The description field is shown just below the command field. Enter a suitable description for your page then stow this page under the name home by using the command "stow home".
At this point you should be able to open a new browser tab and see the initial page of your site. If you are running under a server based sandbox, the url you should open will be something like http://spicymeatballs.yourserverdomain.com (or https if you have installed an ssl certificate). If you are developing on a local machine the url will be http://localhost/spicymeatballs. These urls will launch the default php script which is index.php. If no page is indicated in the url, index.php will launch the default page which is generally the page named "home".
The archive Command
GenHelm allows you to save versions of the current spec periodically in an archive file in case you want to refer back to it or revert back to a previous version. To learn more please visit Archiving and Restoring Specifications.
Getting Help
- This page is one of several general help pages that you can navigate using the links to the right.
- For help on commands you can enter the command "?" into the command line.
- Whenever you see this icon
 you can click on it to obtain help about something near the icon.
 - Almost all labels/prompts in the system are rendered with a subtle underline, this means that you can hover over the label to get a description of the field to which it applies.
- Most models offer model-specific help, to access this help begin by launching the model using the command "e model-name". This will show the model name to the right of the command line. If this model name is a link, click on the link to show the help for the model.
- This icon
 is available whenever a field can be populated from a list of values. Click on the icon to select from a list.
 - When using dollar functions you can click on the function and press <ctrl>g to get help about the function and to be guided as to the parameter requirements. You can even test the dollar function here. Note that this popup may be blocked by your browser and it may be necessary to enable these popups. Change the browser setting to always allow popups for the GenHelm domain.
Help Index
| GenHelm Architecture | GenHelm Architecure. |
| Why GenHelm? | Summary of the GenHelm methodology. |
| Getting Started | Learn how to start a new website. |
| Naming Conventions | Naming web pages and other items. |
| Common Web Page Fields | Descriptions of fields that are common to all page models. |
| Layouts | Defining codeframes and layouts. |
| Styles and Scripts | Descriptions of fields that are common to all page models. |
| Meta Tags | How to configure meta tags for your site and specific pages. |
| Dollar Functions | General information about dollar functions. |
| Navigation Tips | Navigation Tips and Techniques |
| Favourite Icons | How to configure favorite icons for your site. |
| Blog Maintenance | Blog and post administration. |
| Direct Command Help | Help for the direct command field. |
| Programming with GenHelm | Writing programs that interact with the GenHelm framework. |